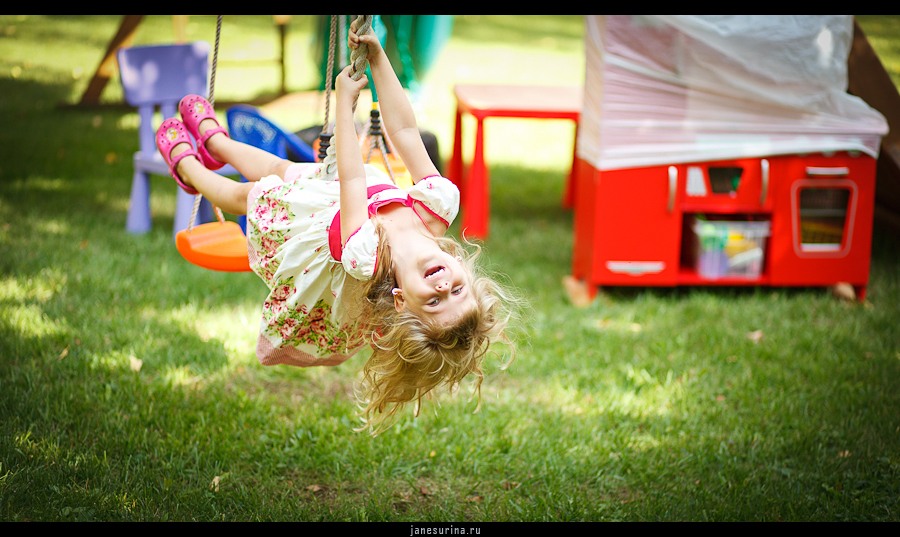
HOW TO PHOTOGRAPHY CHILDREN?
 And again we will return to this issue, since it is always relevant. This article has collected some tips on child photography. They are described below in two parts: “Camera Setup” and “Shooting”. Meet, adopt and remember that nothing in the photo is a dogma.
Start by switching the camera to aperture priority mode. This will allow you to have some creative control over the depth of field, which can be very important for portraits. If your camera does not have such a mode, it may have a “portrait” mode, which is worth a try to get nice fuzzy backgrounds.
Set your aperture to f / 5.6 to get started. This will throw the background out of focus (unless the children stand directly next to the wall), however, it will give you enough depth of field to keep the models’ faces in focus.
Depending on where you are shooting (indoors or outdoors) and what your light looks like – set ISO to 200 (the value below is better if you have a lot of light). If it is too dark and it makes the shutter speed too long, gradually increase the ISO and stop at the smallest possible value. Ideally, if the ISO is not above 800, otherwise you get a pronounced pixelation.
Watch for the shutter speed that your camera automatically picks up. Try to keep its value equal to 1/200 second or more, if you can (when children run, then it is necessary to accelerate – 1/500 will be the best choice or even more).
So, if it’s too dark, you can increase the ISO value or slightly open the aperture. If you are not sure of the shutter speed, and your photos are blurry because the children are moving too fast, try setting the camera to “sports mode”.
Focus mode Set autofocus to focus on one point. In the case of shooting children who, as you know, move a lot in space and quickly, you need to know exactly what your camera is focusing on.
Take pictures in RAW. This will give you more options for editing images in the future. If your time is limited and / or you do not have the ability to edit your work – JPEG will come to the rescue. The combined method of saving captured RAW / JPEG images can also be very convenient.
You can, of course, limit the use of the built-in flash in the camera. With the presence of an external flash, note that the light from it needs to be diffused. For this purpose, special flash diffusers are used, or the flash itself is directed to the side or to the ceiling, from where the light reflects and you get good soft lighting in the room.
In the absence of additional sources of lighting, try to find places for shooting that have good natural light. For example, near large windows or directly near light walls. Try to keep the room filled with diffused light.
Try to use different lenses. For example, you can use a lens with real zoom capability. A lens of 70-200 mm will allow you to shoot at a distance and at the same time fill the frame with a child you are photographing (this lens also has several advantages: it is quite light (f / 2.8) and there is image stabilization). Another approach that can be quite funny is to shoot with wide-angle optics. This will give the images a funny distortion (which, in the end, when used creatively, will help create great pictures).
Before proceeding with some specific advice on shooting, it is worth recalling that a photographer who shoots children should first of all strive to ensure that the children are as comfortable as possible in front of the camera. What needs to be done to establish contact? To talk is time. Take a few test shots and then show them to the kids – these are two. If the age of the child allows you to hold the camera, you can ask him to take your picture. All these actions will set up the child in the desired fashion. The calmer the atmosphere, the better.
The location will depend on your situation, on where you are shooting. Try to think about 2-3 locations that you could use. All this needs to be done before shooting. If you have several hours to shoot, select at least one location in the open air (perhaps a park), one indoors (possibly in the bedroom or in the game room) and also try to find a place with a rather simple background (something color may be fine) for several staged shots. When choosing places, remember that they must be suitable for intensive movement.